
Simple Machine Forum or SMF is a popular free and open source web application that provides internet forum and message board services.
SMF is written in PHP and the current version as of this writing is 2.1 RC4.
In this tutorial we will install SMF using the LAMP stack.
1. Updating the system
To update and upgrade our system, run the command.
sudo apt update && apt upgrade -y2. Apache Installation
In this step we will install the type of web server that we are going to use. To do that run the command.
sudo apt install apache2 -yLet’s start the Apache web server.
sudo systemctl start apache2Let’s enable Apache to start on reboot.
sudo systemctl enable apache2You can check the status of Apache webserver by running this command.
sudo systemctl status apache23. Database Installation and configuration
The database that we are going to use in this tutorial is MariaDB.
To install MariaDB, run this command.
sudo apt install mariadb-server -yAfter the installation, we need to configure MariaDB. To do that run this command.
sudo mysql_secure_installationThe Output.
NOTE: RUNNING ALL PARTS OF THIS SCRIPT IS RECOMMENDED FOR ALL MariaDB
      SERVERS IN PRODUCTION USE!  PLEASE READ EACH STEP CAREFULLY!

In order to log into MariaDB to secure it, we'll need the current
password for the root user.  If you've just installed MariaDB, and
you haven't set the root password yet, the password will be blank,
so you should just press enter here.

Enter current password for root (enter for none): Press Enter
You already have a root password set, so you can safely answer 'n'.

Change the root password? [Y/n] n
Remove anonymous users? [Y/n] YDisallow root login remotely? [Y/n] YRemove test database and access to it? [Y/n] YReload privilege tables now? [Y/n] YAfter that restart MariaDB service.
sudo systemctl restart mariadb4. Installation of PHP and PHP extensions
SMF is written in PHP. To run SMF we need to install PHP and some PHP extensions rquired to run SMF. To do that run the following command.
sudo apt install php libapache2-mod-php libapache2-mod-php php-common php-mbstring php-xmlrpc php-soap php-gd php-xml php-intl php-mysql php-cli php-ldap php-zip php-curl unzipVerify if PHP is installed.
root@techtutorguro:~# sudo php -v
PHP 7.4.3 (cli) (built: Oct 25 2021 18:20:54) ( NTS )
Copyright (c) The PHP Group
Zend Engine v3.4.0, Copyright (c) Zend Technologies
    with Zend OPcache v7.4.3, Copyright (c), by Zend Technologies
Now, we need to edit the PHP configuration file.
sudo nano /etc/php/7.4/cli/php.iniModify the configuration file with below directives.
file_uploads = On
allow_url_fopen = On
memory_limit = 256M
upload_max_filesize = 64M
max_execution_time = 240
Then save the PHP configuration file.
5. Create a Database and Database User for SMF
Now we need to create a database and database user for our SMF application. First we need to enter to the MariaDB console to create a database and database user.
Since we did not set root password to our MariaDB root user we can enter the console by running.
sudo mysqlNow let’s create a SMF database. To create a database run this command.
create database smf;Now let’s create a user and grant all privileges to the database smf.
grant all privileges on smf.* to 'smf_user'@'localhost' identified by 'my_db_user_password';The command above will create the user smf_user and grant all privileges to database smf. Please don’t forget to change ‘my_db_user_password‘ to your preferred password.
Now, let save the changes we made and exit;
flush privileges;
exit;
6. Download SMF latest version
As of this writing the latest version of SMF is 2.1 RC4.
First before we download SMF we need to create a directory to put the application.
Let’s create a directory.
mkdir -p /var/www/smfLet’s download SMF latest version.
wget https://download.simplemachines.org/index.php/smf_2-1-rc4_install.zipExtract it to the directory we created.
unzip smf_2-1-rc4_install.zip -d /var/www/smf/Let change the ownership of the directory to the apache user.
chown -R www-data:www-data /var/www/smf/7. Setup Apache2 virtual host
We need to create a virtual host to properly manage our site and application.
To setup an Apache virtual host first create a configuration file.
sudo nano /etc/apache2/sites-available/mydomain.com.confPlease change the mydomain.com to your own domain name.
Add the content below to the configuration file.
<VirtualHost *:80>
     ServerAdmin [email protected]
     DocumentRoot /var/www/smf
     ServerName mydomain.com
     ServerAlias www.mydomain.com

     ErrorLog ${APACHE_LOG_DIR}/error.log
     CustomLog ${APACHE_LOG_DIR}/access.log combined

     <Directory /var/www/smf/>
        Options +FollowSymlinks
        AllowOverride All
        Require all granted
     </Directory>

</VirtualHost>
Save the configuration file.
Let us enable the virtual host and enable Apache mod_rewrite.
sudo a2ensite mydomain.com.conf
sudo a2enmod rewrite
Then Let us restart Apache service for our configuration to take effect.
Before we restart Apache let us check if the configuration we made has no errors. To do that run this command.
apachectl -t
Syntax OK
If syntax is OK we can proceed in restarting the Apache service
sudo systemctl restart apache28. SMF Installation
Now that we are finished with configuration we can now access the SMF application through our favorite browser and finalize the installation process.
Open http://mydomain.com on your browser.
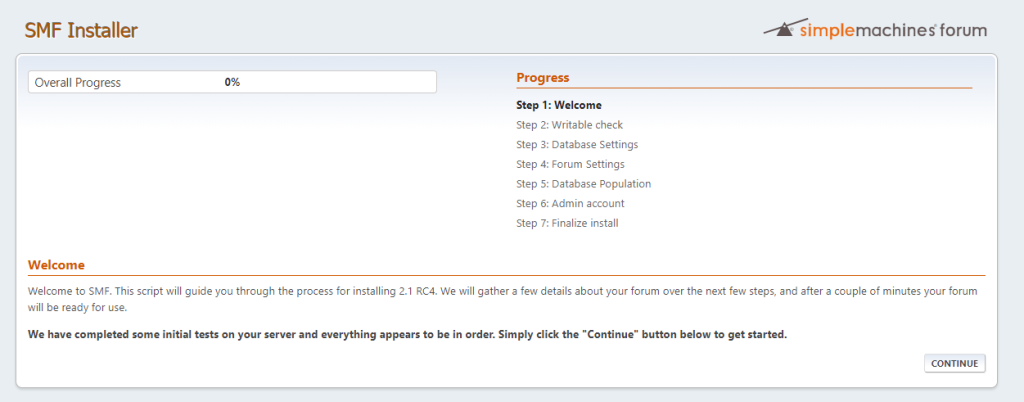
You should see the screen above. Let’s continue in finalizing our installation process and click continue.
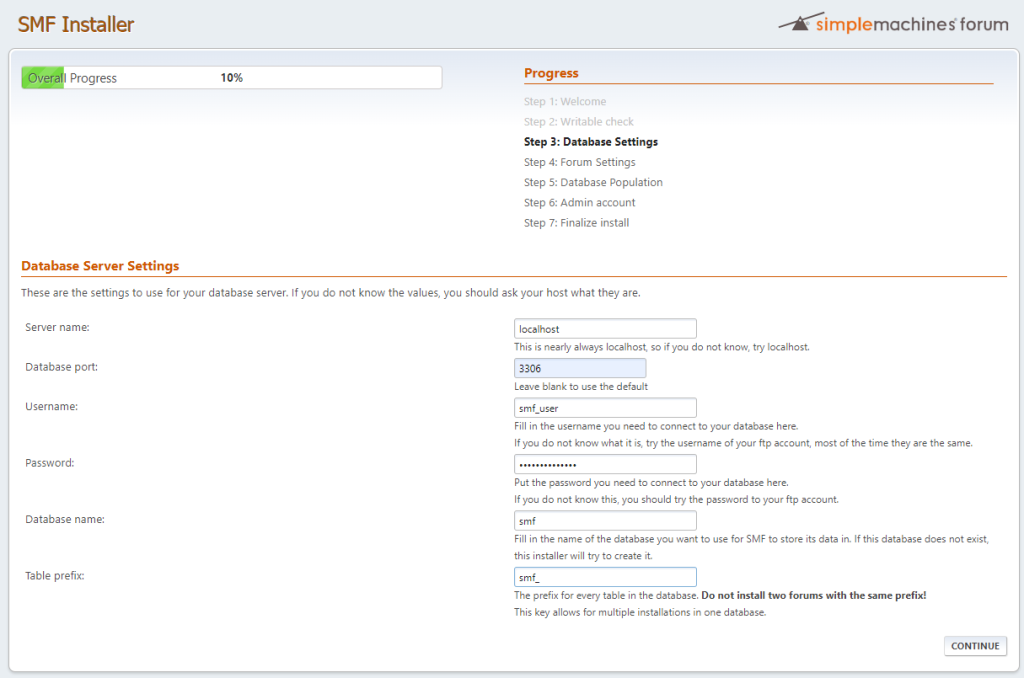
The next step is setting the database values. Put the values we created in step 5 then click continue.
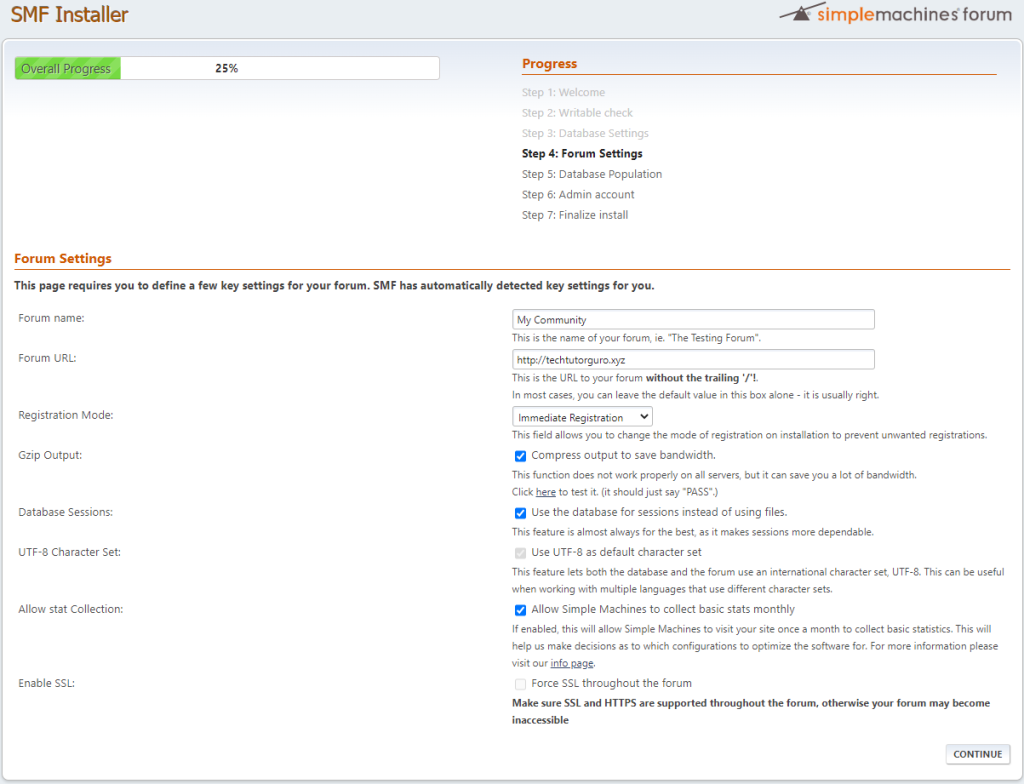
In the Forum settings modify the Forum name to the name of your forum and select your preferred Registration Mode and you can leave the rest as it is then click continue.
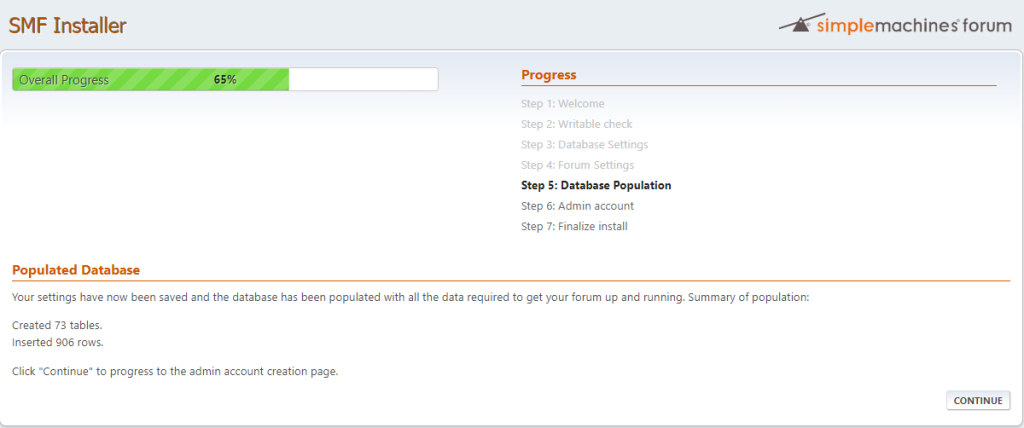
This step will populate the database just click continue.
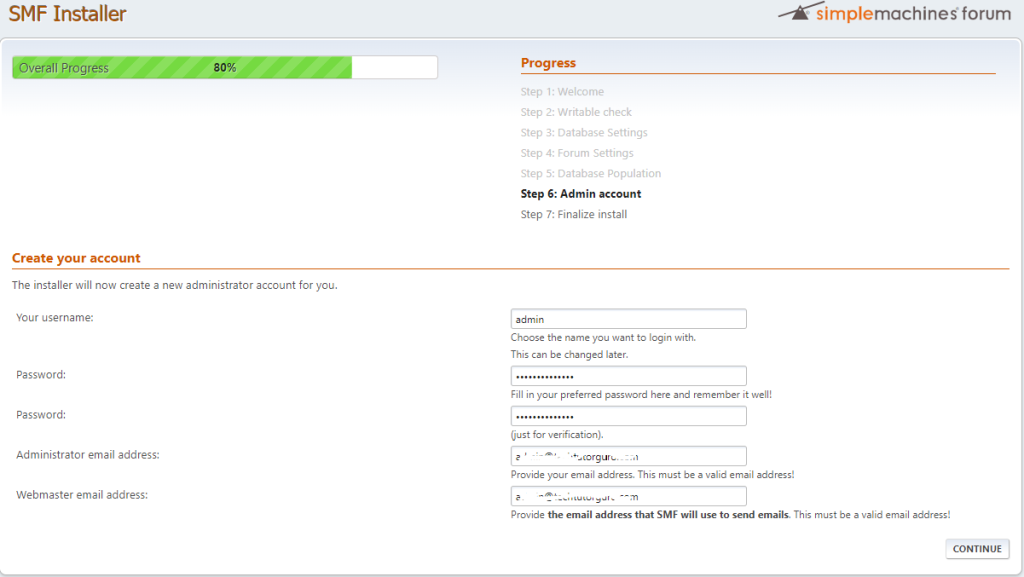
We are almost done with the installation, in this step you will be required to create an administrator account. Just fill up the form and click continue.
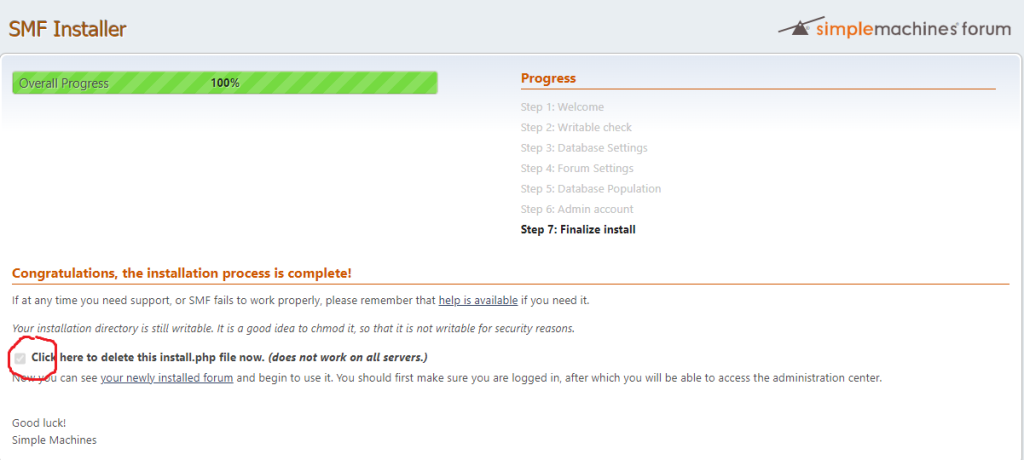
Congratulation we are done with SMF installation but before closing the browser don’t forget to check the check box(Click here to delete this install.php file now. (does not work on all servers.)), this will remove the installation script.
Hope you enjoy our tutorial
Conclusion
You have learned how easy to install SMF on Ubuntu 20.04 with the LAMP stack. If you like this article you might like also our article on phpBB .
If you have questions, feel free to leave a comment and we will try to answer it.
Thank you and hope you enjoy our tutorial ?


